
In the fast-paced world of automotive care, understanding the intricacies of car detailing can significantly elevate your vehicle’s longevity and appearance. Many vehicle owners mistakenly believe that a standard wash is sufficient for maintaining their car’s aesthetic appeal. However, a thorough detailing process dives deeper, addressing not only surface grime but also protecting the underlying paint and finish from everyday hazards. This comprehensive guide will unveil effective car detailing steps that extend protection and enhance the paint quality beyond typical washes. Discover how a systematic approach can safeguard your investment, ensuring your vehicle remains in pristine condition for years to come.
Preparing for Effective Car Detailing: Essential Supplies
Before initiating the detailing process, it’s pivotal to gather the necessary supplies to ensure a seamless and efficient experience. Preparation acts like a foundation, setting the stage for achieving outstanding results. The right tools not only contribute to the aesthetic finish but also protect the vehicle’s paint from potential damage during cleaning.
Essential Tools and Materials
As with any detailed process, having the correct equipment can make all the difference. Below is a useful checklist to guide you in assembling what you need:
- Two wash buckets (one for soapy water, the other for rinse water)
- pH-neutral car wash soap specifically designed for automotive finishes
- Microfiber wash mitts (at least two for effective cleaning)
- Grit guards for each bucket to prevent dirt from scratching the paint
- Clay bar kit for removing embedded contaminants
- Iron remover spray for breaking down brake dust buildup
- Polisher (either dual-action or rotary, depending on your experience)
- Paint sealant or carnauba wax to protect the surface
- Microfiber drying towels to safely absorb water without scratching
- Tire cleaner and dressing for that finishing touch on wheels
- Automotive glass cleaner to achieve streak-free windows
Choosing Between Basic and Premium Supplies
While the basic options are often more accessible, investing in premium materials can yield significant advantages in results. Consider these comparisons:
| Supply Category | Basic Option | Premium Option |
|---|---|---|
| Wash Soap | Generic car soap | pH-neutral foam cannon soap |
| Drying Towel | Terry cloth | Waffle-weave microfiber |
| Paint Protection | Spray wax | Ceramic-infused sealant |
When enhancing the quality of even one or two categories of supplies, the final appearance and durability of your vehicle’s finish can drastically improve. As such, the adage “you get what you pay for” holds particularly true in this context.
Step-by-Step Car Detailing Process
Once the right supplies are acquired and organized, it’s time to embark on a systematic detailing journey. Following a step-by-step approach, akin to a choreographed dance, ensures that no essential step is skipped, which could undermine your efforts.
Beginning with Exterior Preparation
Start the process by thoroughly pre-rinsing the entire vehicle. The goal here is to remove any loose dirt and debris that could scratch the surface during the washing stage. Use a pressure washer or a garden hose, starting from the top and working your way down.
Conducting a Two-Bucket Wash
The two-bucket method is a game changer for avoiding swirl marks. This technique involves:
- Filling one bucket with soapy water using your pH-neutral soap.
- Filling the second bucket with clean water to rinse your wash mitt.
- After washing each panel, rinse the mitt in the clean water to remove any dirt before reloading with soap.
This habit greatly reduces the risk of scratching your paint, as you prevent dirt from being wiped back onto the surface.
Decontaminating the Surface with a Clay Bar
After the wash, run your hands across the surface of the paint. If it feels rough or gritty, it’s time to utilize a clay bar. This step is essential as it removes bonded contaminants that regular washes miss, restoring a smooth, glossy feel.
Polishing to Restore the Paint’s Gloss
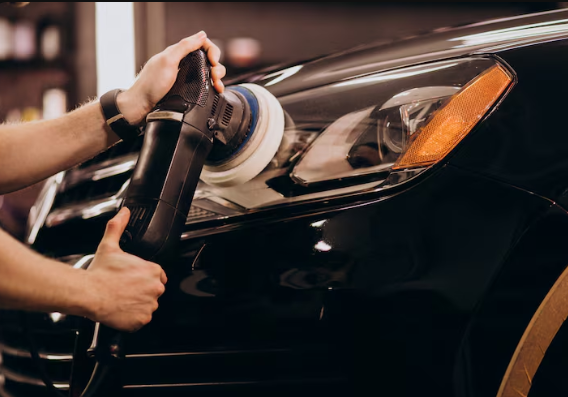
Paint polishing is a vital step that corrects imperfections in the clear coat. Using a dual-action polisher and the appropriate pads, follow a pattern while working the polish into the surface. This helps eliminate haze and minor scratches, providing a sparkling finish.
Applying Protection: Sealant and Wax
After the surface has been polished, it is time to protect your work with a high-quality sealant or wax. This layer acts as a barrier against environmental contaminants.
Choosing Between Sealant and Wax
The choice between using a sealant or wax often comes down to personal preference, though both offer protection:
- Sealants typically provide a longer-lasting effect (up to a year) and are resistant to acid rain and UV rays.
- Waxes, especially carnauba, give a warm, deep shine but may need reapplication every few months.
Whichever product you choose, applying it correctly is vital to maximizing its protective qualities. After following the manufacturer’s instructions, ensure the vehicle is not exposed to moisture for as long as recommended.
Final Touches: Tires and Trim Care
Don’t forget about the often-overlooked areas. Clean your tires and apply a dressing to restore their original black color while protecting against UV damage. Use a trim restoration product on any faded plastic parts for an enhanced overall appearance.
With the right techniques, quality products, and a consistent detailing routine, you can preserve your vehicle’s paint, enhance its appearance, and protect it from everyday wear. Call a professional support in car detailing services.